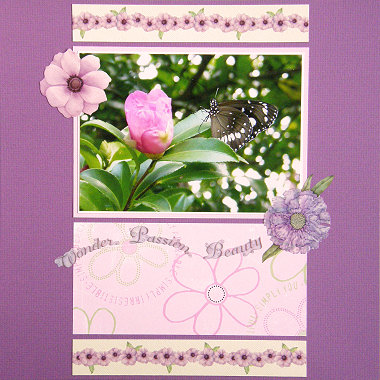
One of the best pieces of advice I can give about using scrapbooking stickers is not to be afraid of cutting them! Border stickers are great for framing or anchoring your page but sometimes you just don’t want them to be 12 inches long. Does that mean you shouldn’t use them? Of course not! In this layout I have trimmed two gorgeous floral border stickers down to size for a stunning effect.
This layout was created using Carolees Creations Simply Worn Daisies paper, purple Bazzill cardstock, leaf green Bazzill cardstock, pink Bazzill cardstock, cream cardstock and NRN Designs Misty Flowers stickers.
To recreate this scrapbook page idea, follow these steps:
1. Use the purple Bazzill cardstock as your background.
2. Mat a 5×7 photo with cream cardstock and again with pink Bazzill cardstock. Measure the width of your matted photo (mine is 19cm). This will give you the width for the other pieces you are about to make. I will call this width ‘width X’.
3. Cut two pieces of leaf green Bazzill cardstock measuring ‘width X’ by 2.8cm. Adhere a border sticker across the middle each one. Trim the edges of your stickers to fit.
4. Cut a piece of Carolees Creations Simply Worn Daisies paper measuring ‘width X’ by 9cm.
5. Glue your first piece of green cardstock to your page so that it is centred horizontally and is approximately 0.4cm from the top edge, as shown in the layout above. Below it, glue your photo and below it, glue your Worn Daisies paper. Make sure you leave a space between each one. Finally, glue the second piece of green cardstock underneath your Worn Daisies paper, as shown in the layout above.
6. Adhere one of your purple flower stickers in the bottom right corner of your photo and another towards the top left corner of the photo.
7. Finish off by arranging three word stickers in a curvy line underneath your photo, as shown in the layout above.
What do you think? Do you like this scrapbooking idea? Do you have any questions? Would you have done anything different? We’d love to hear from you! Please leave a comment below.


[...] Click Here For More Information About This Layout [...]