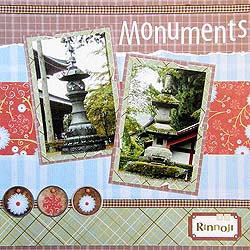
Scrapbooking with ribbon is a great way to add texture and pizzazz to your scrapbooking layouts but if you haven’t used scrapbooking ribbon before, the process can be a little daunting. One of the biggest problems I am always asked about is how to attach ribbon to your page so that it stays in place. So, I thought I would put this guide on adhering ribbon together for you.
I warn you though, once you start using ribbon, you will be addicted!
Methods Of Adhering Ribbon
1. Liquid glue such as KI Memories Gloo ensures your ribbon stays permanently attached to your page. However, it is often messy and takes time to dry. This makes it difficult to finish your page in one sitting as you have to wait for the glue to dry before moving on to the next step. Personally, I do use KI Memories Gloo, but when other methods are not appropriate.
2. Brads eliminate the need for an adhesive. To attach them, position the ribbon on your page and poke a small hole through the ribbon right though to the back of the page. Feed the brad through the hole and flatten the arms of the brad on the back of your page. This is a very useful method of attachment if you want your ribbon to lie flat but not glued all the way along. Also keep in mind that a brad is three-dimensional and will stand out from your page a little.
3. Xyron Create-A-Sticker is my favourite way to adhere ribbon to a page. It is the perfect tool when you want your ribbon to lie completely flat and be glued all the way along. To use a Xyron, simply feed your ribbon in the top and pull it out the bottom. As the ribbon passes through this nifty little gadget, adhesive is attached to the bottom of the ribbon, turning it into a sticker.
4. Stitching is a time-consuming technique, but if you do take the time to do it, the effects can be stunning. Either by hand or with a sewing machine, stitch along both edges of the ribbon. Alternatively, place a handful of stitches in a few strategic positions along the ribbon to hold it in place. Another popular method is to cut a small piece of ribbon (perhaps 5cm long) and place a few stitches in the middle of the ribbon so that it is securely attached to your page while leaving the ends free for you to tie a bow or a knot.
5. Threaded effects can also look wonderful. To achieve this, cut your paper with either a craft knife or a small hole punch and thread the ribbon through the holes. This allows you secure your ribbon exactly where you want it. For example, you could cut a series of slits in a row and thread the ribbon through to create a weaved effect. Alternatively, punch two small holes, thread your ribbon through and tie a knot. To avoid tearing your paper, be careful not place your cuts too closely together and only use strong paper or cardstock.
Employing a combination of the techniques listed above on your scrapbooking pages will have you creating page after page with scrapbooking ribbon while still keeping your layouts looking fresh and original.
I’d love to hear your ideas for using scrapbooking ribbon. Please leave a comment in the comments box below.


I would always opt for quality versus quantity – this is the main reason why I use the “stitching” technique. However, sometimes when I get too tired to sew the ribbon, I would go for brads.
Free Asian dating sites are the best things for single women and men search and interact with each
other for love, romance, and relationship.
That’s all pretty good stuff, you might agree, but what about liars.
Just browse the internet to search for the best dating niche you
like and create a personal ad.